Custom Binding, part 2

It took so long for me to get the time to successfully focus on the task, I decided to split this topic into 2 parts, and get phase 1 out so I can articulate my gain from what was read.

Where we left off was the final lesson of the second tutorial, and I mentioned I wanted to dive into docs.
Starting off at Binding, I had read it before but so what if this is the eighth time. This time I paid a little more focus to the area where they say it is Mentioned In: – sure search? They repeat search three of the four times. I didn’t attach significance to this before. Started reading the first link and imagining- a search bar. How is it responsible? Making some activity happen, such as a search or maybe a filter, which will probably change some other view. That makes sense.

Further down, docs state we require storage in the form of a String to perform the search. This is where we have our first Binding in the form of ($). Properties are still @EnvironmentObject & @State but this data we are sending to DepartmentList & ProductList will end up changing those views. I hope I am understanding this correctly.

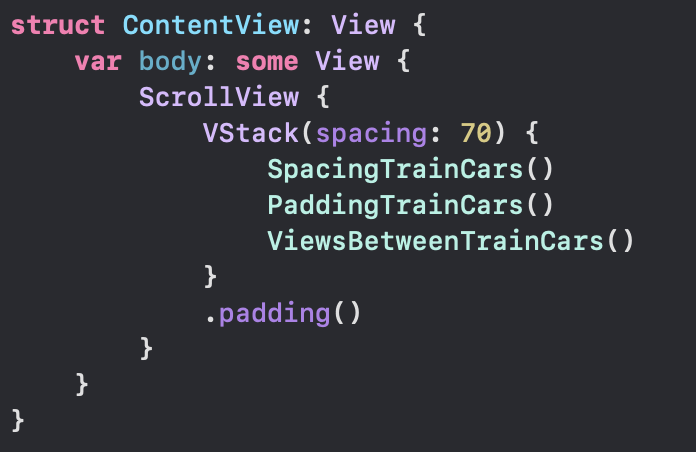
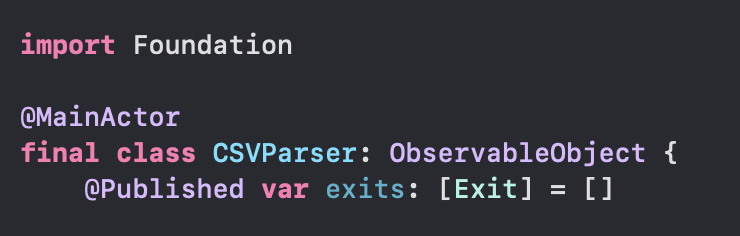
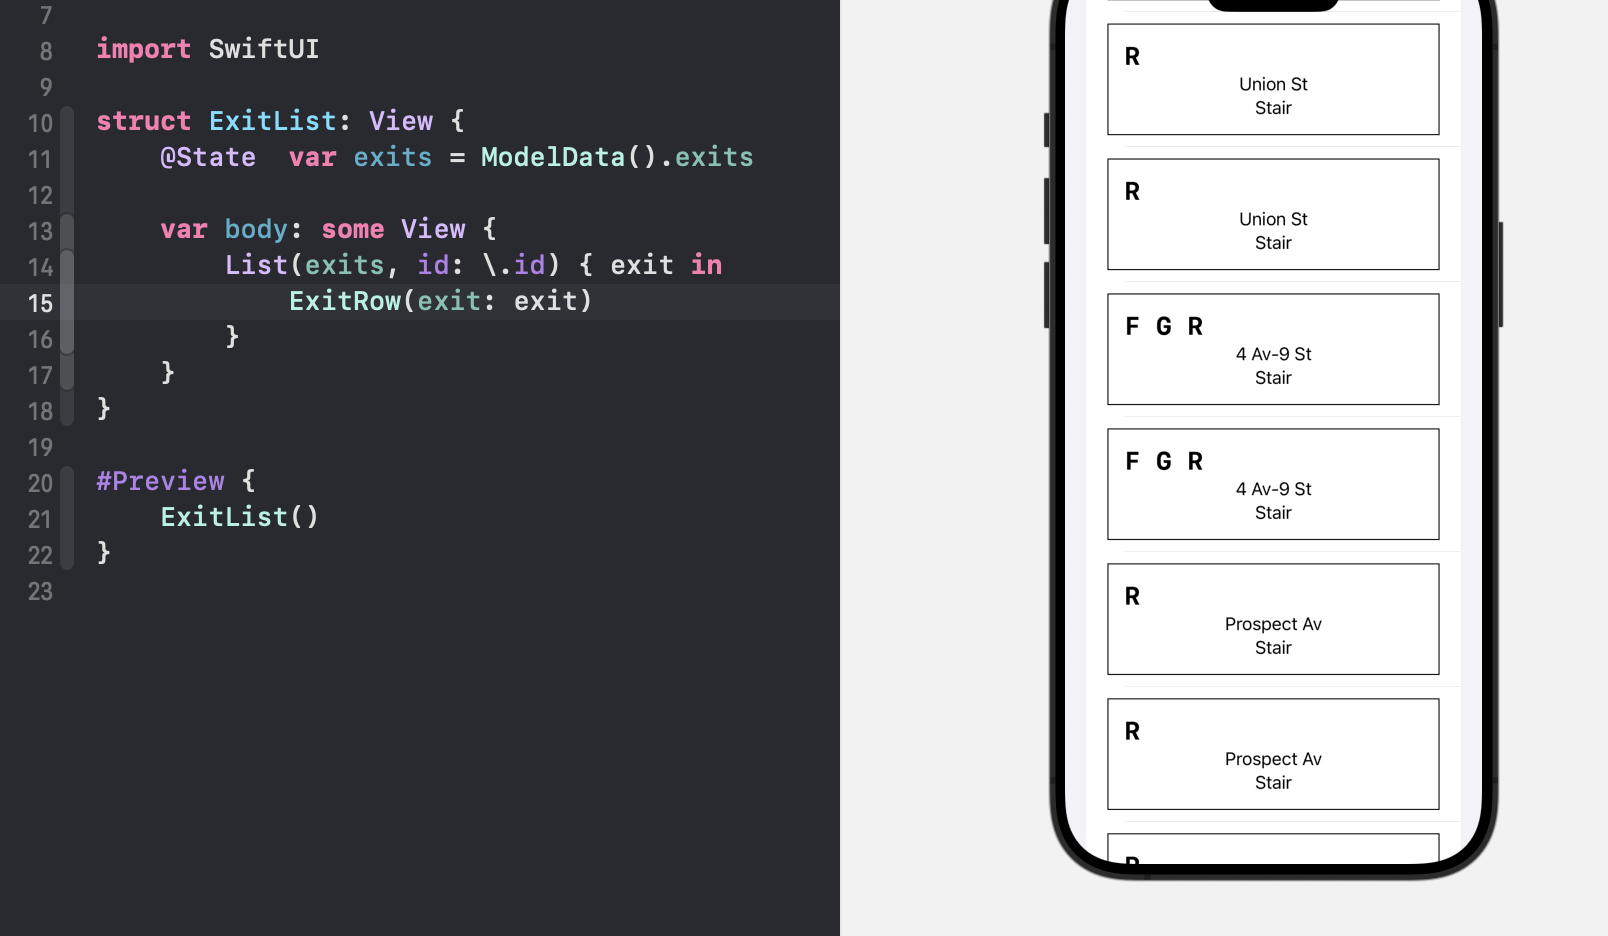
struct ContentView: View {
    @EnvironmentObject private var model: Model
    @State private var departmentId: Department.ID?
    @State private var productId: Product.ID?


    var body: some View {
        NavigationSplitView {
            DepartmentList(departmentId: $departmentId)
        } content: {
            ProductList(departmentId: departmentId, productId: $productId)
                .searchable(text: $model.searchText)
        } detail: {
            ProductDetails(productId: productId)
        }
    }
}

The next link used nearly the same substance as the first, I would have expected the examples to be different 😅
Third link discusses activating the search link. I’m a little searched out, I want to dive into Binding.
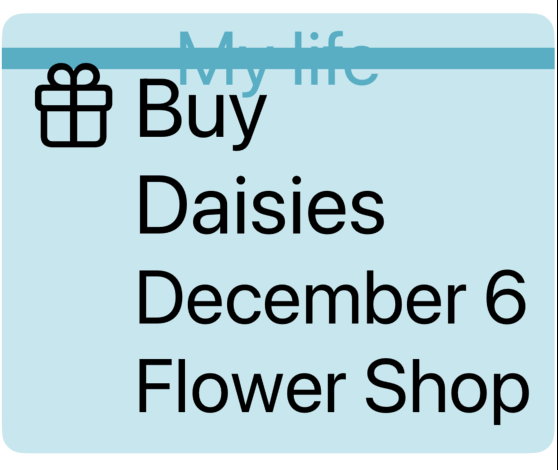
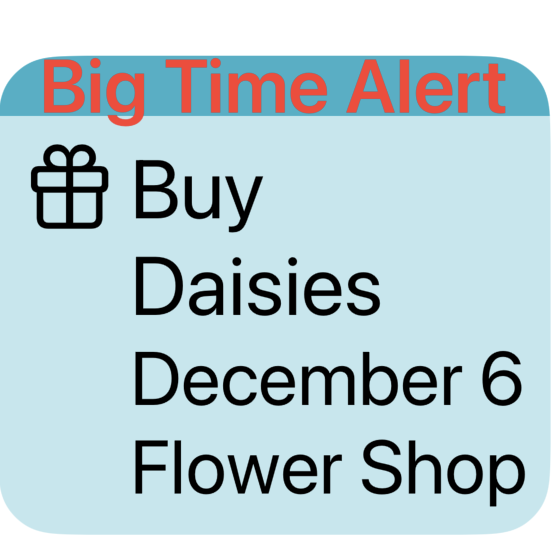
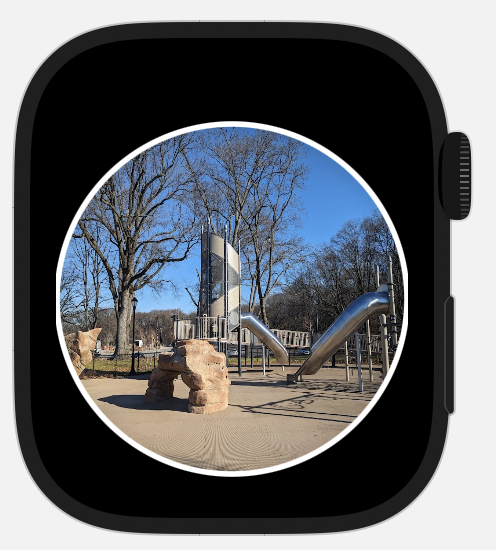
Fourth link is my favorite as it has this graphic:

OK- so Our view, on top, has a @State or @Environment property, our subview which has the Binding takes the $ sign. Inside this view, this property would be @Binding and the data has the potential to change the whole view. Does this make sense? Anyone agree or disagree with my theory of Binding? Feel free to email me at info<at>mvilabrera.com and let’s chat! It took me awhile to grasp this so if I am getting it wrong, please let me know. 🙂‍↕️

Now I feel like I got heaps out of reading all those docs, yet the tutorial feels flat. I’m at an impasse, it is self-imposed. We have SwiftUI Sample Apps, which is nice, they are teaching stuff we didn’t work on such as networking, gestures & machine learning. What I do not like is, lessons are pre-formed like it is here. 🫤 Then there is Scrumdinger, which is an app that helps organize meetings, with a timer & a bell. Apple hasn’t really linked to this so… idk- but I like this because we are creating a new app & creating new files as we go. Develop In Swift is also there, they cover Swift Testing, Swift Data & visionOS. I can’t decide which to start with and explore.

Standard

S p a c i n g

This lesson helped tie things together for me. Start by downloading the app right away, check out ContentView & TrainCar files. We have a VStack embedded in a ScrollView, spacing on the VStack is 70.
We can observe three embedded views, SpacingTrainCars, PaddingTrainCars, & ViewsBetweenTrainCars. Below in the project navigator we see folders for Spacing, Padding and Adding Views.

Immediately I jumped down to the Spacing folder and started looking at all the files. It was fun changing values and seeing the result right away, changing the Dynamic Type & trying all over again.

It seems this lesson brought out the boy in me 👦🏾
At first I did not like the pre-made lesson, now its growing on me

I went through the views, adding a background and saw they don’t layer the way I would figure they should. Let me give an example:

I colored backgrounds here at the top. Scaled Spacing has different shades of gray. Zero Spacing has the 🇮🇹. So what?
I drilled down to TrainCar & gave it a background too. The Image inside the body of TrainCar was given a background of .systemGreen.
Looking at all of them, I saw they were all made .systemGreen.

Removing the .systemGreen background modifier at the base level allowed all the colors above to propagate down and display. I feel like there is more I could learn about this lesson, but I want to keep publishing for y’all and wrap this up!

Standard

Content with Stacks

Downloading the sample app, I went to Dynamic Type immediately to check how it handled AX5.
I am curious. If Design wished to have some text in the ribbon above, and that text changes size, how would we also get the ribbon to change size with it? Obviously we could not keep the stripeHeight at a constant 15, maybe this is something I missed, hopefully an answer will appear in my mind overnight 😅🌝

Let’s say the text in red was to scale up with the dark ribbon at the top of our tile. Would it spill out of the ribbon? Could the ribbon grow to accommodate the text, while satisfying the ratio on the bottom half?
I want to review an earlier project in this series. For now, I want to solve this.

Thinking about it, I wanted to stop and implement text in the top. How would I got about this?

Starting with the following, what is provided in the bottom of EventTile:

.background {
    ZStack(alignment: .top) {
        Rectangle()
            .opacity(0.3)
        Rectangle()
            .frame(maxHeight: stripeHeight)
    }
    .foregroundColor(.teal)


I started tinkering on the top Rectangle. I forgot that we are stacking our views and each next view typed underneath is layered over this view. My first ZStack was focused around the top rect, then I said what the hey? tinker with the bottom one. And after I did…

//Suddenly it clicked and it's like- okay. 
.background {
    ZStack(alignment: .top) {
        
        Rectangle()     // this is the bright pretty teal ON BOTTOM
            .opacity(0.3)
        
        ZStack {
            Rectangle() // this is the bar ON TOP 🤦‍♂️
                .frame(maxHeight: stripeHeight)
            Text("My life")
        }
        
    }
    .foregroundColor(.teal)

I’m kind of mad it took me this long to figure it out 😅
But I’m glad I made it past the lump. I guess I got my answer so far- No the banner does Not increase in size to accommodate the text. At least not this way 👨‍🍳

Updating the top property stripeHeight to have @ScaledMetric attribute did help here. So there’s that- I remember we used that in the other lesson to allow the Capsule to gain in size.

But some of you know the problem here. Design is off.

The text should be inside the ribbon

To remedy this, I increased the stripeHeight- but this is one of those problems where I feel like the product team or designer would slam me for changing that 😅 Which is fair- if we don’t have the text there everything would appear different as a result. So I want to put this idea on the shelf- how to keep the same stripeHeight & shrink the font to something manageable.

Took some time away and came back, feeling like I had a solution to the problem.

@ScaledMetric(relativeTo: .subheadline) var stripeHeight = 18.0
var body: some View {
    ...
.background {
     ZStack(alignment: .top) {
     Rectangle()     // this is the bright pretty teal
                .opacity(0.3)
     ZStack {
                Rectangle()
                Text("Big Time Alert")
                    .foregroundStyle(.red)
                    .font(.subheadline)
     }
     .frame(maxHeight: stripeHeight)
}
.foregroundColor(.teal)

So- what’s going on?
I changed the Text(“Big Time Alert”) font to accommodate the ScaledMetric dynamic property, and I set that font to .subheadline so the actual size fits design and we can fit our text into the Rectangle better.

Standard

How I’d do this

Some of you may wonder why I bothered to criticize 🍎 after all they contributed. Could I show the relationship between an App, Scene & View better? I don’t know. But I can try. Let’s begin:

I had a quick fumble after believing I saw something wild, such as:

import SwiftUI

@main
struct SceneStartApp: App {
    var body: some Scene {
        WindowGroup {
            Text("Hello World")
        }
    }
}

which if you yourself try this will learn that this does not work 😅

Let’s conclude there are no ‘bounds’ for this Text View to be in. Since we cannot define where on the device to show our Text view, the app will crash.

Let us add bounds in our SceneStartApp, and change our Text into a Circle().

import SwiftUI

@main
struct SceneStartApp: App {
    var body: some Scene {
        WindowGroup {
            HStack {
                Circle()
                Circle()
                Circle()
            }
        }
    }
}

Changing the HStack also gave me new alignments, below are VStack & ZStack respectively.

The code for my circles never changed. The ZStack aligns our three circles on top so the user always looks down on them- or the orientation would be deep “inside” the phone, like marbles in the pocket.

One thing we are missing when we do this, is the preview window. I had to run the app 3 times to view what was created, which is not ideal. Let us now remove the three Circle() lines, put ‘ContentView()’ back and add below that line:

        ContentView()
            .onAppear(perform: {
                Task {
                    let urlString = "https://www.apple.com"
                    guard let url = URL(string: urlString) else { return }
                    let urlRequest = URLRequest(url: url)
                    let (data, response) = try await URLSession.shared.data(for: urlRequest)
                    print(data)
                    print(response)
                }
            })

The line right after ‘ContentView()’ is called a modifier, the contents of which will be run when our ContentView() is ready to appear. Inside the modifier, we create a Task, and inside of this we are creating a url String. We are going to take the String and make it into a URL object. The URL object next becomes a URL Request object. The URLRequest object is then passed to URLSession so we can receive the contents of that request. Finally, our data which is returned can be printed, and the response can be printed further below. The results of the print statements show up when we run the project:

189053 bytes
<NSHTTPURLResponse: 0x600000235300> { URL: https://www.apple.com/ } { Status Code: 200, Headers {
    "Cache-Control" =     (
        "max-age=0"
    );
    "Content-Encoding" =     (
        gzip
    );
    "Content-Length" =     (
        40058
    );
    "Content-Type" =     (
        "text/html; charset=utf-8"
    );
    Date =     (
        "Fri, 08 Nov 2024 20:20:38 GMT"
    );
    Expires =     (
        "Fri, 08 Nov 2024 20:20:38 GMT"
    );
    Server =     (
        Apple
    );
    "Set-Cookie" =     (
        "geo=US; path=/; domain=.apple.com"
    );
    "Strict-Transport-Security" =     (
        "max-age=31536000; includeSubdomains; preload"
    );
    Vary =     (
        "Accept-Encoding"
    );
    "content-security-policy" =     (
        "default-src 'self' blob: data: *.akamaized.net *.apple.com *.apple-mapkit.com *.cdn-apple.com *.organicfruitapps.com; child-src blob: mailto: embed.music.apple.com embed.podcasts.apple.com https://recyclingprogram.apple.com swdlp.apple.com www.apple.com www.instagram.com platform.twitter.com www.youtube-nocookie.com; img-src 'unsafe-inline' blob: data: *.apple.com *.apple-mapkit.com *.cdn-apple.com *.mzstatic.com; script-src 'unsafe-inline' 'unsafe-eval' blob: *.apple.com *.apple-mapkit.com www.instagram.com platform.twitter.com; style-src 'unsafe-inline' *.apple.com"
    );
    "referrer-policy" =     (
        "no-referrer-when-downgrade"
    );
    "x-cache" =     (
        "TCP_MEM_HIT from a23-196-2-157.deploy.akamaitechnologies.com (AkamaiGHost/11.7.0.1-2fb65fbfa7ad4f98bbb706cf20e2b5f6) (-)"
    );
    "x-content-type-options" =     (
        nosniff
    );
    "x-frame-options" =     (
        SAMEORIGIN
    );
    "x-xss-protection" =     (
        "1; mode=block"
    );
} }

All this happens when we are loading our ContentView, the system will make our Task go and hit apple.com, and return some information.

Standard

Taking a little time

To think about what I want to build in SwiftUI!
I know what I had said in the last post. That I’m not ready yet.
SwiftUI is still intimidating for me. I’m hoping that the more I work with it & write about it the better I’ll feel. So here we go.

I remember I had a code challenge, which did not go well. The challenge was something I had done on my own, but it’s something we don’t do every day, parse a CSV file. So what’s going on with that?

CSV is a Comma Separated Value file, looking at it we see a table of usually more than 2 rows
The top row is our ‘key’. Every row under that we have our data.

The data I found is Open Data from New York State, there is tons of different types of data there, the data I want to focus on is around the New York City Subway. Exits & entrances in particular.

This is a small piece of all the data, reflected through Preview on Mac. Below is how it is seen in the file:

Altogether we have 2,121 rows of data. So what?
I want to put it in a List in SwiftUI.
Thinking out loud how to solve this…
Create an ObservableObject Class which will parse the CSV, collect the objects & send them to the view?
I really have no clue, family!
I started just like that, Main Actor Class, conforming to ObservableObject

Now let me drag the file into the project 😅 For reference, my Exit object looks like this

Ok. Originally starting this idea I was going to make this class use Main Actor, ObservableObject, etc.
This quickly became whatever parses CSV in Stack Overflow 😭. Since I was abandoning the idea of the Observable class (for now), I kept thinking how the heck am I going to get this working?
Then I went back to the good old tutorial from Landmarks. They had us parse a JSON file early in the guide, so I left out the JSON part and just broke apart the CSV. I made a gist to share how that would look. Got that result rendering in my Preview pane 👨‍🍳 + 😘

Not quite a List tho… but now I know I am close

Had a mental block and some challenges at home but I kept plugging at it- then I realized it was so easy!

Next my goal will be to fit this on to the map. Getting this to click feels 🌞 🤗 🍯

Standard

watchOS

It felt like I blinked & now the project is almost done!
In this lesson, we add a watchOS target to the app. I add mine to Spotz
I had some hiccups here.
Section 1 was fine, where we add the target
Section 2, where we link the files from iOS to watchOS, I had an error.
The Embedded Binary Certificate for the watch app was not in sync with the iOS app, as a result Xcode refused to build. Following the suggestion from the linked StackOverflow page helped me solve it.
The next issue was one of my own design 😅
‘Command CompileAssetCatalog failed with a nonzero exit code’
I had imported an image asset too large to be the icon (App icons should only be 1024×1024, this one was 1200×1200). In the past I don’t ever remember this being an issue, but lately Xcode is evolving and things that used to work before do not work today. Fixed the icon size, pressed CTRL-B & all went green.

Read up on how Label() & Text() differ. With Text, we just post that- text. A Label is a bit more robust as it will also post text, and also give an image. That’s pretty 😎

My challenge with the images from earlier came back to bite me again. The images did not render correctly, so I added a .scaleEffect modifier that took CGSize as a parameter. I set the CGSize to 0.7 width & height, that made the final product look better.

When I started updating beyond this screen, it looked worse 😅
I tried tinkering with .scaleEffect but the result made the image smaller, not the actual frame.
I dove down to CircleImage and reduced the frame from 250 to 200. It is not everything I want but it is better than earlier.

Moving forward, I had more challenges with sizing in this lesson, design is not my strength 😅
My solution is to shrink the frame, or wrap it in a ScrollView, and keep it moving 😤

The last part, they had us mock User Notification to go through the watch simulator. That was inspiring- in a way getting my feet wet in a framework that has been described to me as ‘challenging’. Well today I tinkered with it and received a good result.

Standard

UIKit X SwiftUI

What they have us do here is add a feature that has no SwiftUI API. That’s okay! They walk us through implementing the protocol which helps SwiftUI & UIKit frameworks ‘talk’ to each other.

This lesson is pretty important. Try to type everything out, as there are many moving pieces here.

UIPageViewController has a data source and a delegate.
The data source is responsible for ‘which item is supposed to be where in the list
The delegate allows the flow to be customized, ‘do you want to change how we turn the page?’
While I love this OG doc, some things have changed, such as the datasource is no longer optional.

During the tutorial, they guide us to create our own separate object to hold our data source, this is called the Coordinator. The Coordinator class is generated inside the UIViewControllerRepresentable struct.

UIPageViewController has page indicators at the bottom to display to the user how many ‘pages’ there are. The Coordinator class holds our UIPageViewController subclass and the view controllers it is meant to display. The data source has us implement two required functions:

Which View Controller should we display earlier?

func pageViewController(_ pageViewController: UIPageViewController, viewControllerBefore viewController: UIViewController) -> UIViewController?


Inside this function, we are thinking about the viewControllerBefore, as the parameter states. We want to make sure when we swipe back (or previous) we have a view to land on. We get the ‘index’ after returning the ‘firstIndex’ function on the ‘controllers’ array. We need to make sure we can receive a ‘firstIndex’ or we are tossing it all out by returning nil.
Next thing we do is check if the index is equal to zero, and if it is, we will ask to return the last controller in the array. Finally we will return one controller from the array, using the ‘index’ variable using subscript syntax.

Which View Controller should we display later?

func pageViewController(_ pageViewController: UIPageViewController, viewControllerAfter viewController: UIViewController) -> UIViewController?


This one is similar to above. Going the opposite direction, we want to see if there is a viewControllerAfter. We are checking that the ‘firstIndex’ is legit. If the index returned plus one is equal to the number of counts for controllers, well we don’t want that (feels like a crash 🌋)
If index could be zero, and the controllers.count is equal to one, we return that first controller.
Otherwise, we return the controller marked by the index from the array, offset by plus one.

This lesson gets me excited, because there are a few frameworks that haven’t received any love from SwiftUI (SpriteKit, SceneKit, ARKit 👀) and this lesson can help me think about how to fit these into an app I might want to build.

Okay- follow along a bit further and we create a new Coordinator. This time it implements the UIKit object UIPageControl. We use this as a design enhancement improving the UIPageViewController.

Hand-typing along is really cool- there are some autocomplete gotchas that showed up for me, when working the Coordinator in particular.

Standard

Third lesson, hot topics 📚🔥

Link to Spotz
Each chapter gets added as a git branch then merged to main.

Handling User Input juggles a few hot topics. @State, @Environment, @Binding & @Observable.
When I finished the tutorial I had no grasp on any of it. Turned to the documentation for some clarity.
Trying to read with my sons play fighting & pushing back against morning drowsiness had me circling back & rechecking but when I got to Binding it started to click- use this property wrapper to get read & write the source of truth and update the whole view. State property wrapper could update the whole view but it is read only. I hope I am understanding this correctly 😅 Environment passes a value into the view. Observable is a macro that makes the object conform to the ‘Observable’ protocol. This allows SwiftUI to see when the object being observed has a change made, and SwiftUI can update the view.

Standard

Lesson Two, Preview Hiccups

I look to the Previews while coding to be sure what I am coding is correct, and from time to time it feels as though if one file is ‘off’ or does not compile, the system will not enable SwiftUI previews. Thankfully, the error pointed straight to the issue. I had created an instance variable on my view, and as a result the Preview macro was seeking a place to pull data from something. Kind of like when you are hungry, your whole body stops to notice the stomach.

The second hiccup I guess is minor- I got to the end where we preview the app on iPad- I thought I saw a ‘rotate’ button or something to that effect (‘Landscape Left’) that was not visible on my end.

While checking Previews, Xcode seems to have had enough of me and just force-quit itself 😭

I have a few thoughts.
If I had to put more photos in the app, how could I accomplish it? I know Apple put out a sample app called Meme Creator to solve this, but if I didn’t know, how would I solve this problem? Some people may imagine a best practice to be stuff the images into the app and submit it to the store that way.
Next, how would we test this? Which architecture is a good fit?
If I could expand on this app, what would I do?

I have the idea for a feature where you meet your friends, you and your circle open up location sharing in the app and meet at a ‘Spot’
Also, maybe you don’t know how to find your designated ‘Spot’- I would create a feature that gives directions from your location to the ‘Spot’.
I would create a feature where this app can get a photo, store the location and name of a new park. Storage is a concern, SwiftData is possible for storing information.
AFAIK, all three would require location sharing with the app permissions, the third would require camera access also.

Standard

Swift & SwiftUI Tutorials from Apple

Good morning

When talking about Swift & SwiftUI with new learners, I often get asked ‘Where is the best source for learning it?” There are thousands of resources. First I want to start with the sources from Apple, which is all FREE

Develop In Swift Explorations
Develop In Swift Fundamentals
Develop In Swift Data Collections

The above books I became familiar with when I joined NYPL. While I worked there, I was trained using these materials. The resources above are primarily focused on UIKit, with small segments featuring SwiftUI. Swift Explorations & Fundamentals help learners understand the basics of Swift with UIKit, and Data Collections shares how to work with complex UIs, such as Table views & Collection views, animations, and network requests.

Introducing SwiftUI (Landmarks)
Develop Apps for Apple Platforms (Scrumdinger)
Learning SwiftUI (Concepts Tutorial)
Develop In Swift

The above websites I found while starting my SwiftUI journey. I think I had done Landmarks, later finding the Concepts Tutorial, then I learned of Scrumdinger, and finally Develop In Swift feels like the most recent, with tutorials on how to use SwiftData & visionOS.

It is a little confusing why 🍎 made so many (on SwiftUI), with little continuity between the lessons. Feels as though the four folks (or four teams) that made these would have benefitted had they worked together. My plan is to go through these lessons and document it here with my opinion.

Xcode & SwiftUI Resources

Did a quick search while waiting, I hadn’t realized I had skipped over 2 remaining sources from Apple:

Sample Apps Tutorials (Navigation, Presenting Content, Network requests, Gestures in SwiftUI, Displaying Photos & Machine Learning)
Swift.org– 5 different apps (Command-Line tool, a library, web service, iOS and macOS app, & embedded app for a microcontroller)

*October 8th update*
This Instruments Tutorial dropped (at least I was not aware of it when I started this idea, I learned of it from Twitter) and I believe it should be on this list

*December 26th update*
SwiftUI Pathway
All Pathways
Design, Swift, SwiftUI, Games, VisionOS & Distribution to the App Store

Standard