Taking a little time

To think about what I want to build in SwiftUI!
I know what I had said in the last post. That I’m not ready yet.
SwiftUI is still intimidating for me. I’m hoping that the more I work with it & write about it the better I’ll feel. So here we go.

I remember I had a code challenge, which did not go well. The challenge was something I had done on my own, but it’s something we don’t do every day, parse a CSV file. So what’s going on with that?

CSV is a Comma Separated Value file, looking at it we see a table of usually more than 2 rows
The top row is our ‘key’. Every row under that we have our data.

The data I found is Open Data from New York State, there is tons of different types of data there, the data I want to focus on is around the New York City Subway. Exits & entrances in particular.

This is a small piece of all the data, reflected through Preview on Mac. Below is how it is seen in the file:

Altogether we have 2,121 rows of data. So what?
I want to put it in a List in SwiftUI.
Thinking out loud how to solve this…
Create an ObservableObject Class which will parse the CSV, collect the objects & send them to the view?
I really have no clue, family!
I started just like that, Main Actor Class, conforming to ObservableObject

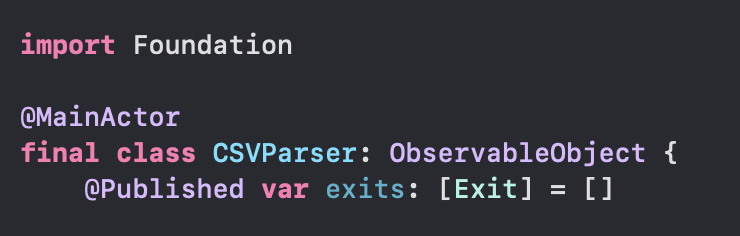
Now let me drag the file into the project 😅 For reference, my Exit object looks like this

Ok. Originally starting this idea I was going to make this class use Main Actor, ObservableObject, etc.
This quickly became whatever parses CSV in Stack Overflow 😭. Since I was abandoning the idea of the Observable class (for now), I kept thinking how the heck am I going to get this working?
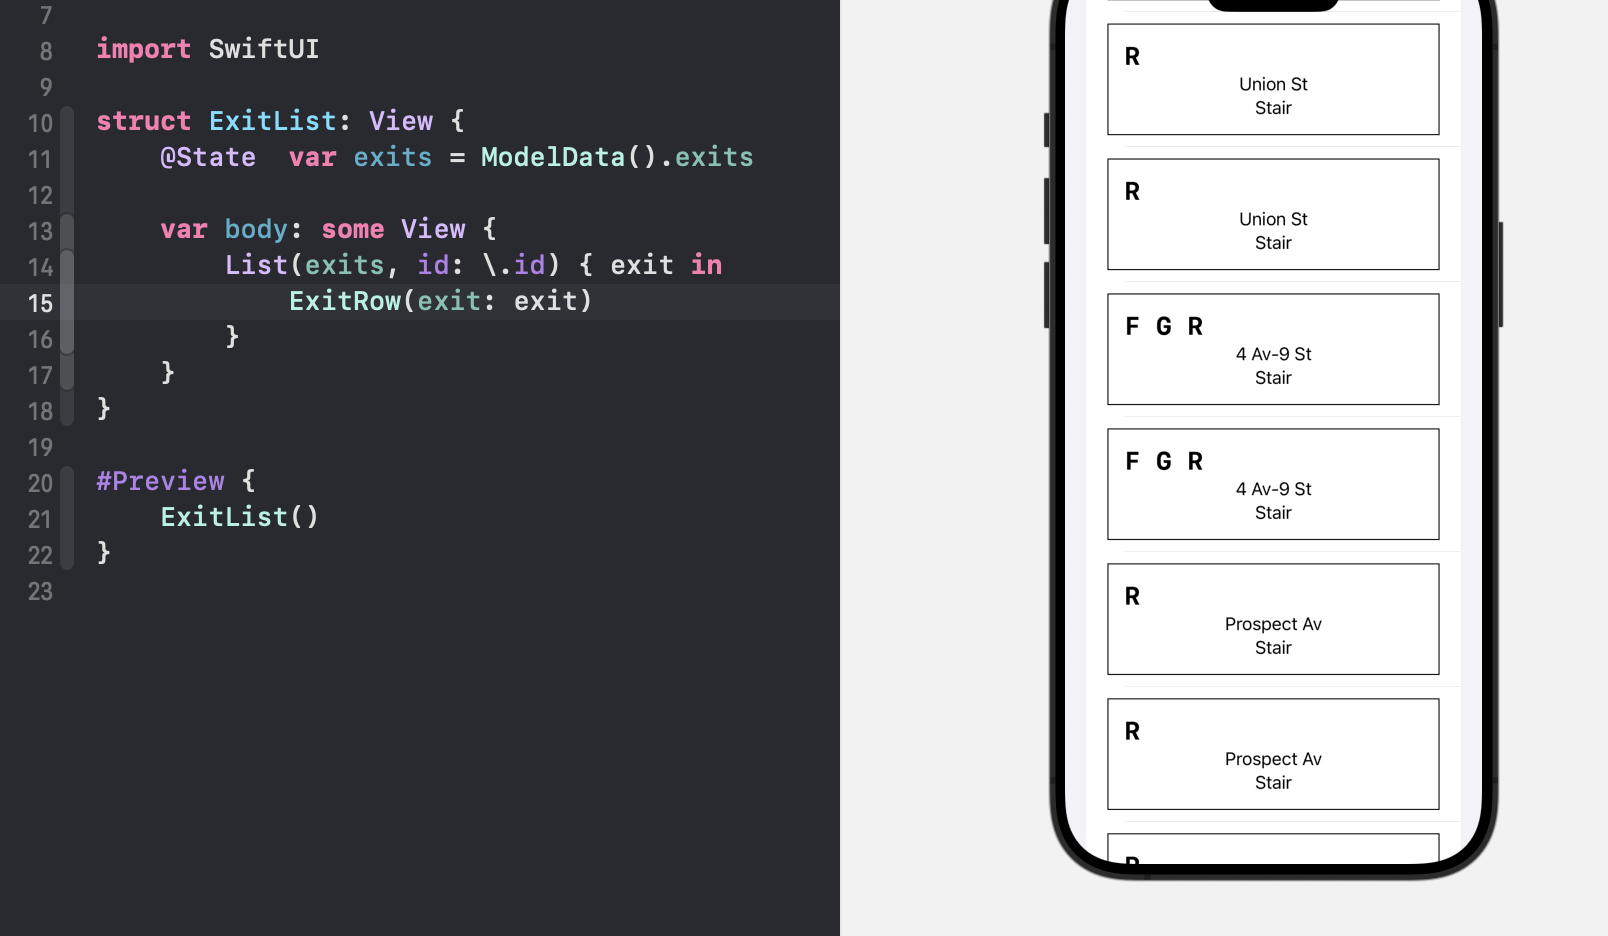
Then I went back to the good old tutorial from Landmarks. They had us parse a JSON file early in the guide, so I left out the JSON part and just broke apart the CSV. I made a gist to share how that would look. Got that result rendering in my Preview pane 👨‍🍳 + 😘

Not quite a List tho… but now I know I am close

Had a mental block and some challenges at home but I kept plugging at it- then I realized it was so easy!

Next my goal will be to fit this on to the map. Getting this to click feels 🌞 🤗 🍯

Standard

macOS & thoughts

I had a blast working on this exercise & I can’t wait to start the next lesson.

First challenge was around the nesting of the SpotList. My picker view rendered itself endlessly across the top, when I found how to nest this properly, that issue went away.

Had a few discovery moments beyond proofreading the code I typed in, earlier I wrote that the docs seem to be scattered when they were all listed together the whole time 🤦‍♂️

I’ll link the 3 they attach up there:
Introducing SwiftUI
Learning SwiftUI (Concepts Tutorials)
Exploring SwiftUI Sample Apps

Still, these were created by 🍎 & they are kind of ‘unreferenced’
App Dev Tutorials (mostly Scrumdinger)
Develop In Swift Tutorials
For App Dev Tutorials, they don’t just teach SwiftUI. It is also UIKit, Testing & Networking.
Develop In Swift breaks down SwiftUI, SwiftData, & visionOS.

Back to the lesson just completed, if I were tasked with implementing a new greenfield app in SwiftUI, would I want to? Not yet. UIKit still offers me predictability & consistency. I want to document my experience with the next lesson and see if that sentiment has changed or remained the same.

I am interested in having a greenfield iOS SwiftUI app though. I’ll bite the bullet & force myself to implement an app which I had thought of making for a few moons now 🌝

Standard

watchOS

It felt like I blinked & now the project is almost done!
In this lesson, we add a watchOS target to the app. I add mine to Spotz
I had some hiccups here.
Section 1 was fine, where we add the target
Section 2, where we link the files from iOS to watchOS, I had an error.
The Embedded Binary Certificate for the watch app was not in sync with the iOS app, as a result Xcode refused to build. Following the suggestion from the linked StackOverflow page helped me solve it.
The next issue was one of my own design 😅
‘Command CompileAssetCatalog failed with a nonzero exit code’
I had imported an image asset too large to be the icon (App icons should only be 1024×1024, this one was 1200×1200). In the past I don’t ever remember this being an issue, but lately Xcode is evolving and things that used to work before do not work today. Fixed the icon size, pressed CTRL-B & all went green.

Read up on how Label() & Text() differ. With Text, we just post that- text. A Label is a bit more robust as it will also post text, and also give an image. That’s pretty 😎

My challenge with the images from earlier came back to bite me again. The images did not render correctly, so I added a .scaleEffect modifier that took CGSize as a parameter. I set the CGSize to 0.7 width & height, that made the final product look better.

When I started updating beyond this screen, it looked worse 😅
I tried tinkering with .scaleEffect but the result made the image smaller, not the actual frame.
I dove down to CircleImage and reduced the frame from 250 to 200. It is not everything I want but it is better than earlier.

Moving forward, I had more challenges with sizing in this lesson, design is not my strength 😅
My solution is to shrink the frame, or wrap it in a ScrollView, and keep it moving 😤

The last part, they had us mock User Notification to go through the watch simulator. That was inspiring- in a way getting my feet wet in a framework that has been described to me as ‘challenging’. Well today I tinkered with it and received a good result.

Standard

UIKit X SwiftUI

What they have us do here is add a feature that has no SwiftUI API. That’s okay! They walk us through implementing the protocol which helps SwiftUI & UIKit frameworks ‘talk’ to each other.

This lesson is pretty important. Try to type everything out, as there are many moving pieces here.

UIPageViewController has a data source and a delegate.
The data source is responsible for ‘which item is supposed to be where in the list
The delegate allows the flow to be customized, ‘do you want to change how we turn the page?’
While I love this OG doc, some things have changed, such as the datasource is no longer optional.

During the tutorial, they guide us to create our own separate object to hold our data source, this is called the Coordinator. The Coordinator class is generated inside the UIViewControllerRepresentable struct.

UIPageViewController has page indicators at the bottom to display to the user how many ‘pages’ there are. The Coordinator class holds our UIPageViewController subclass and the view controllers it is meant to display. The data source has us implement two required functions:

Which View Controller should we display earlier?

func pageViewController(_ pageViewController: UIPageViewController, viewControllerBefore viewController: UIViewController) -> UIViewController?


Inside this function, we are thinking about the viewControllerBefore, as the parameter states. We want to make sure when we swipe back (or previous) we have a view to land on. We get the ‘index’ after returning the ‘firstIndex’ function on the ‘controllers’ array. We need to make sure we can receive a ‘firstIndex’ or we are tossing it all out by returning nil.
Next thing we do is check if the index is equal to zero, and if it is, we will ask to return the last controller in the array. Finally we will return one controller from the array, using the ‘index’ variable using subscript syntax.

Which View Controller should we display later?

func pageViewController(_ pageViewController: UIPageViewController, viewControllerAfter viewController: UIViewController) -> UIViewController?


This one is similar to above. Going the opposite direction, we want to see if there is a viewControllerAfter. We are checking that the ‘firstIndex’ is legit. If the index returned plus one is equal to the number of counts for controllers, well we don’t want that (feels like a crash 🌋)
If index could be zero, and the controllers.count is equal to one, we return that first controller.
Otherwise, we return the controller marked by the index from the array, offset by plus one.

This lesson gets me excited, because there are a few frameworks that haven’t received any love from SwiftUI (SpriteKit, SceneKit, ARKit 👀) and this lesson can help me think about how to fit these into an app I might want to build.

Okay- follow along a bit further and we create a new Coordinator. This time it implements the UIKit object UIPageControl. We use this as a design enhancement improving the UIPageViewController.

Hand-typing along is really cool- there are some autocomplete gotchas that showed up for me, when working the Coordinator in particular.

Standard

UI Controls 🎛️

So… what is the deal with ‘Text()’ & ‘Label()’? This chapter had us using them in a seemingly interchangeable way- or am I mistaking things?

This lesson was pretty smooth, we got some more practice in with @Environment, @State & @Binding.

We built out a component for saving the User Profile.

I went back & started chaining the animation that I wasn’t happy with before- the one where HikeView would cover the view above it-

In the moveAndFade AnyTransition, for the .removal component, I had it do
.move(edge: .top).combined(with: .opacity).combined(with: .scale)
which gave it a bounce & disappear action for dismissal.

Standard

Complex Interfaces

Starting this chapter, I remember when I was tasked with implementing a Collection View inside a TableView row, configure the data sources (this was before Diffable Data Sources) and display the concept to a client. Seeing this again I got a little shake of fear 😨

I did steer my app into differences here, there are different types of ‘Spotz’ one may find themselves in: a spot for Biking, Historical, a Field, Playground, or Pond.

One thing I noticed, when I went to create an HStack or Stack, the system would autocomplete:

And the learning material has it as such:

It kind of scratches me the wrong way. The parameter ‘content’ is not really necessary here, I wish there was a way to omit that and have autocomplete suggest the method signature I prefer & keep it that way.
I’m not really feeling the SwiftUI Inspector which is available by CTRL-clicking on the View or Stack. Typing feels more natural and I’d like a solution that works that way.

Another small diversion I made was to the property, on the object ‘Landmarks’, our ‘Spot’ has no feature. We are instead interested if we hadVisited a Spot, or not. If you are following me, add the property on the ‘Spot’ where they add ‘isFeatured’, we add ‘hadVisited’.

Standard

Animation

This is where my stuff & what Apple continues started to differ slightly. My ‘hikeData.json’ names a park with many hiking trails where the World’s Fair in 1960 was held. I wonder why we don’t do a ‘World’s Fair’ anymore. 🤷‍♂️

This chapter moved pretty quickly, the biggest hangup I had was mis-naming one of the ‘Hike’ properties heartRate. Instead I put heartRage 😅 😤 I took a break then found the error the next morning.
Aside from the hangup, this chapter was pretty fun. HikeView has an animation that dismisses the view by shrinking it and reducing its opacity.
I had an idea to make it raise up- until I saw the view was animating over everything & it did not look good.
.asymmetric(insertion: .move(edge: .trailing), removal: .move(edge: .top)) // LOOKS AWFUL 🙅‍♂️
What about it looks so bad? Well, place my change in HikeView.swift after you complete what Apple gives you. You may notice the animation flies over the original button, looking broken. Seems like there should be a layer we can tell the system to dismiss the animation from underneath, that would be nice.

Standard

CMD-OPT-ENT

Accidentally losing your SwiftUI preview could send you into a frenzy. I can’t see squat! Quick search on the forums helped me out after combing the menubar did not help, Command-Option-Enter to start & hide the preview window.

Now onto the lesson:

It is very mathy, and there are several lines to write. Resist the urge to copy and try to type it out.
I made a bug then caught it when I noticed the rendering did not appear quite correct.
width += xScale

width *= xScale

Things went fine till it was time to create the RotateBadgeSymbol. I had a strange error that I forgot to screenshot. Building the project (CMD-B) seemed to solve the error that shut the preview down.

They have us use CGFloat mostly throughout this chapter. CGPoint helps us shape the Badge, and later CGPoint builds the mountain which will have it hover over the badge. Wrapping up the lesson, they had us place new files in a folder ‘Badges’. After doing so, I am unable to preview ‘Badge.swift’ but the others can be previewed 😤
Quitting Xcode & restarting the project seems to do the trick here.

This lesson was pretty cool- creating a gradient seems straightforward & having a path ‘draw’ a shape and the shape is moved around- there’s a lot to wrap my head around before I start making my own shapes. Given limitless time I’d probably look around here and see how to master Path

Standard

Third lesson, hot topics 📚🔥

Link to Spotz
Each chapter gets added as a git branch then merged to main.

Handling User Input juggles a few hot topics. @State, @Environment, @Binding & @Observable.
When I finished the tutorial I had no grasp on any of it. Turned to the documentation for some clarity.
Trying to read with my sons play fighting & pushing back against morning drowsiness had me circling back & rechecking but when I got to Binding it started to click- use this property wrapper to get read & write the source of truth and update the whole view. State property wrapper could update the whole view but it is read only. I hope I am understanding this correctly 😅 Environment passes a value into the view. Observable is a macro that makes the object conform to the ‘Observable’ protocol. This allows SwiftUI to see when the object being observed has a change made, and SwiftUI can update the view.

Standard

Lesson Two, Preview Hiccups

I look to the Previews while coding to be sure what I am coding is correct, and from time to time it feels as though if one file is ‘off’ or does not compile, the system will not enable SwiftUI previews. Thankfully, the error pointed straight to the issue. I had created an instance variable on my view, and as a result the Preview macro was seeking a place to pull data from something. Kind of like when you are hungry, your whole body stops to notice the stomach.

The second hiccup I guess is minor- I got to the end where we preview the app on iPad- I thought I saw a ‘rotate’ button or something to that effect (‘Landscape Left’) that was not visible on my end.

While checking Previews, Xcode seems to have had enough of me and just force-quit itself 😭

I have a few thoughts.
If I had to put more photos in the app, how could I accomplish it? I know Apple put out a sample app called Meme Creator to solve this, but if I didn’t know, how would I solve this problem? Some people may imagine a best practice to be stuff the images into the app and submit it to the store that way.
Next, how would we test this? Which architecture is a good fit?
If I could expand on this app, what would I do?

I have the idea for a feature where you meet your friends, you and your circle open up location sharing in the app and meet at a ‘Spot’
Also, maybe you don’t know how to find your designated ‘Spot’- I would create a feature that gives directions from your location to the ‘Spot’.
I would create a feature where this app can get a photo, store the location and name of a new park. Storage is a concern, SwiftData is possible for storing information.
AFAIK, all three would require location sharing with the app permissions, the third would require camera access also.

Standard